After you have connected to Virtual Systems as your backup service provider and set up a local backup job, you can create a backup copy job.
For the steps to set up backup services from Virtual Systems, see our Quickstart guide.
6 Steps to Creating a Backup Copy Job
Your Backup Copy job will run so that it will transfer the data to the Cloud Repository. Creating a backup copy job will minimize additional load on your environment’s virtual machine (VM) and your backup infrastructure. That’s because Veeam doesn’t need to write production data across the public network during the job as it copies existing backup data to the cloud repository. Follow these steps to create a Veeam backup copy job based on Virtual Systems’ recommendations.
1. In the Home tab of your Veeam Backup & Replication console, click Backup Copy.
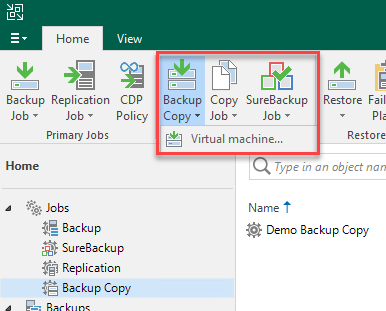
From the drop-down menu, select the option needed for the type of backup:
- Virtual machine > VMware vSphere backup to create a copy of VMware VM backup
- Virtual machine > VMware vCloud director backup to create a copy of a VMware vCloud vApp backup
- Virtual machine > Microsoft Hyper-V backup to create a copy of a Microsoft Hyper-V backup
- Windows computer backup to create a copy of a Windows computer Veeam Agent backup
- Linux computer backup to create a copy of a Linux computer Veeam Agent backup
- Veeam Agent for Mac backup to create a copy of a Mac computer Veeam Agent backup*Only options that are available from configured backups are shown in the menu.
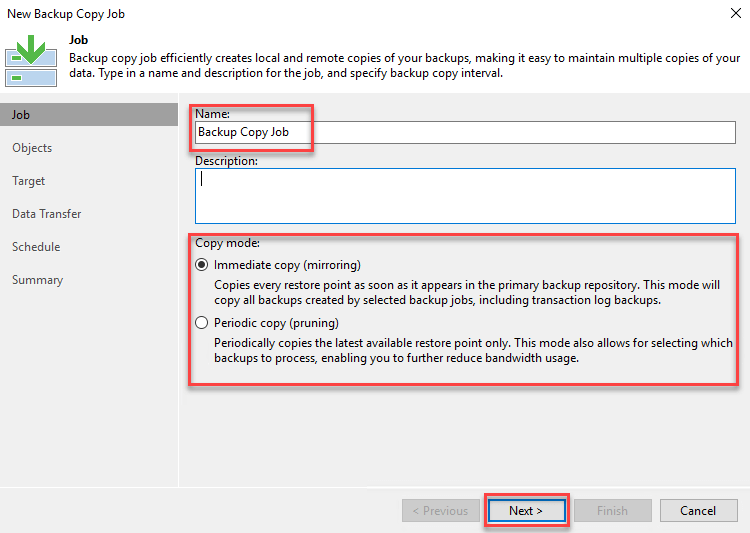
2. Next, in the New Backup Copy Job window, enter a name and description and specify a Copy Mode.
It’s important to remember that once you’ve configured the backup copy job, you won’t be able to change the mode you select.
Copy mode options:
Immediate copy mode: Veeam Backup & Replication copies restore points as soon as they are in a backup repository. Veeam only copies restore points created by the backup jobs you select when configuring the backup copy job. Veeam can also copy transaction logs if you choose this option in job settings. Immediate copy mode is supported for backups created with:
- Veeam Backup & Replication
- Veeam Agent for Microsoft Windows
- Veeam Agent for Linux operating in the managed mode
- Veeam Plug-ins for Enterprise Applications
- Only backups created by backup jobs managed by the backup server are supported.
Periodic copy mode: Veeam Backup & Replication copies restore points once you specify an interval in backup copy job settings. Veeam can copy restore points created by backup jobs or restore points of individual machines. If you choose Backup Jobs when configuring your copy job settings, Veeam only copies restore points that the selected jobs create. If you select Machines, Veeam copies all restore points on that machine, even if they were created by different backup jobs. Periodic copy mode is supported for backups created with:
- Veeam Backup & Replication
- Veeam Agent for Microsoft Windows
- Veeam Agent for Linux operating in the standalone or managed mode
- Managed backup mode: Veeam backs up jobs managed by the backup server and jobs managed by Veeam Agent. Backups created with Veeam Backup for Nutanix AHV are also supported.

NOTE: The default backup copy interval is one day. If you need a different interval, you can change it when configuring the backup copy job down to hours and minutes. Remember that if you set up a backup copy interval that’s too short, errors can occur.
When you have finished configuring copy mode, click Next.
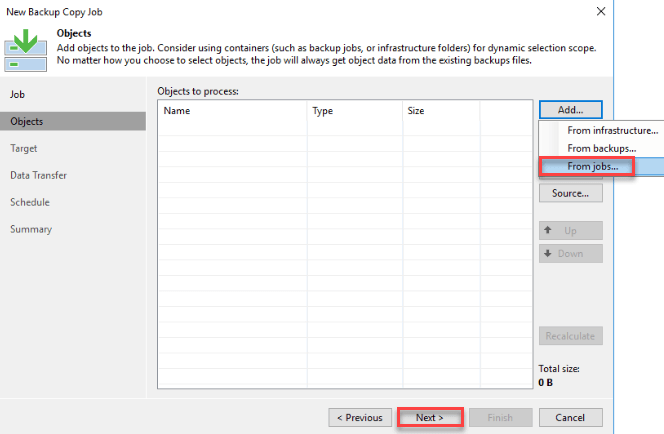
3. In Objects, click Add, and then in the drop-down, click From jobs… This will allows you to select a local backup job to copy to a Virtual Systems Cloud Repository. Note that whatever the selection you choose, Veeam will copy the data from the backup file. Once you have chosen the backup to copy, click Next. Note that whatever the selection you choose, Veeam will copy the data from the backup file.
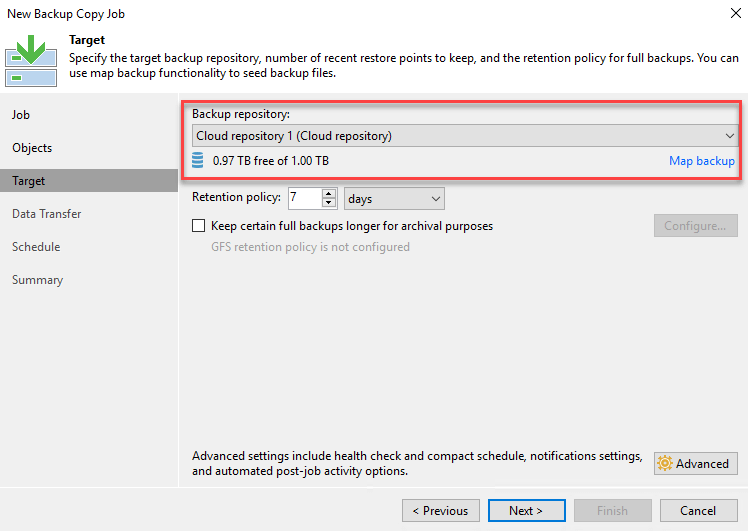
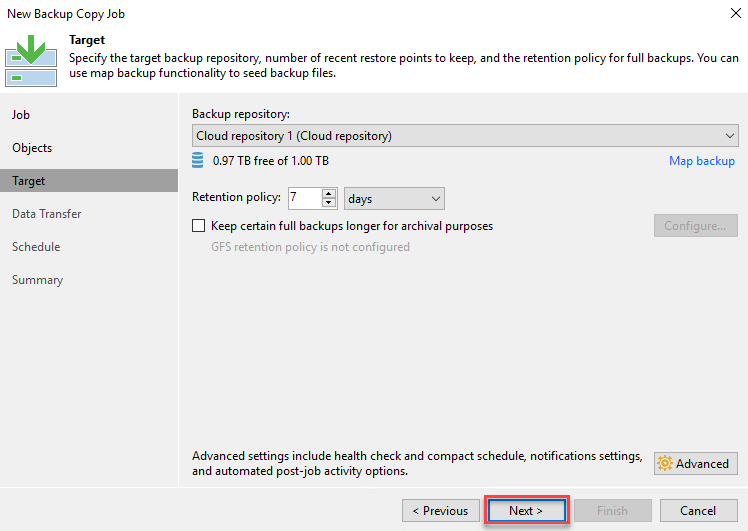
4. Choose the Backup Repository name from the drop-down menu. You can also configure GFS restore points by checking Keep certain full backups longer for archival purposes. Note available storage when setting restore points and archive options. Archival backups are managed separately from daily backups and use the same amount of space as a full backup. For example, four weekly backups will use the same space as four full backup files, in addition to seven days of daily backups.
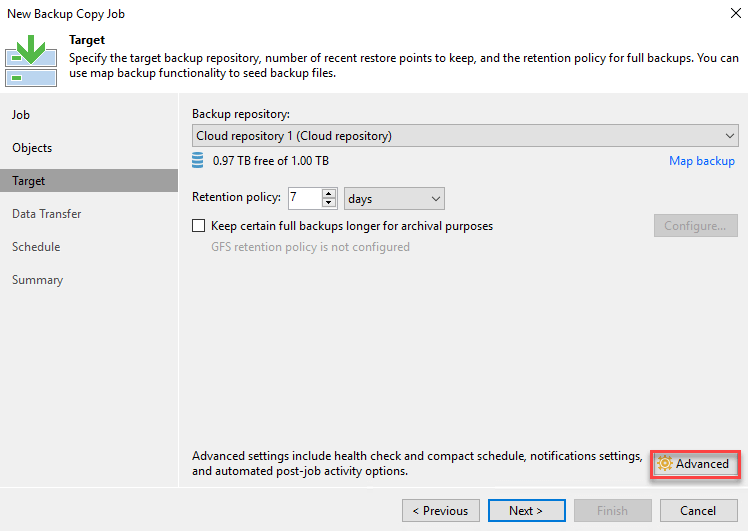
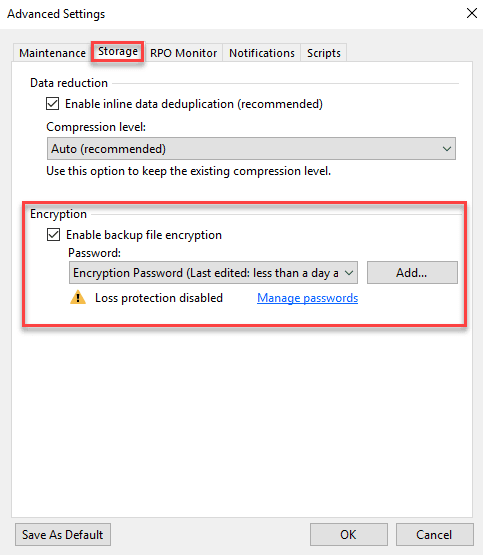
5. Virtual Systems recommends that you now click Advanced.
5. In the Storage tab, we recommend you set the Enable backup file encryption checkbox and then select your encryption password. If you do not have a encryption password configured, click Add to create one. Note that Virtual Systems is unable to decrypt the data if you lose the encryption password. Therefore, ensure you keep it in a safe place. Also, note, you can encrypt a backup copy job whether the local backup job is encrypted enabled or not. When you are set, click OK.
6. Click Next.
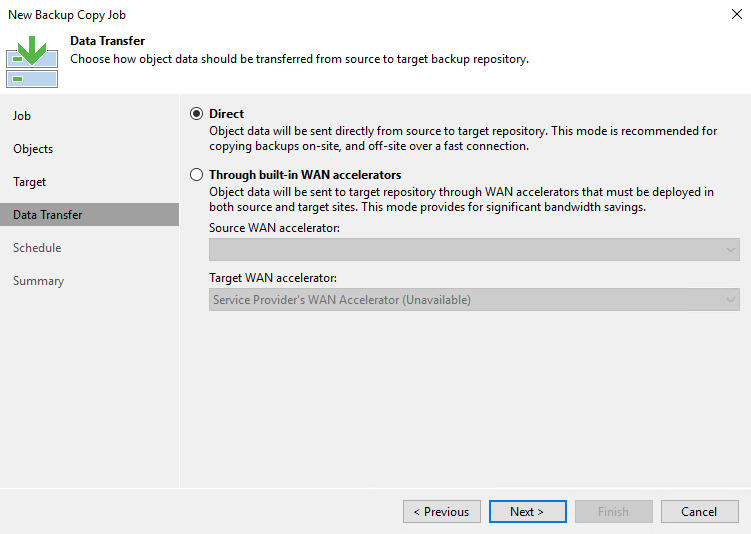
7. Ensure Direct is selected and click Next.
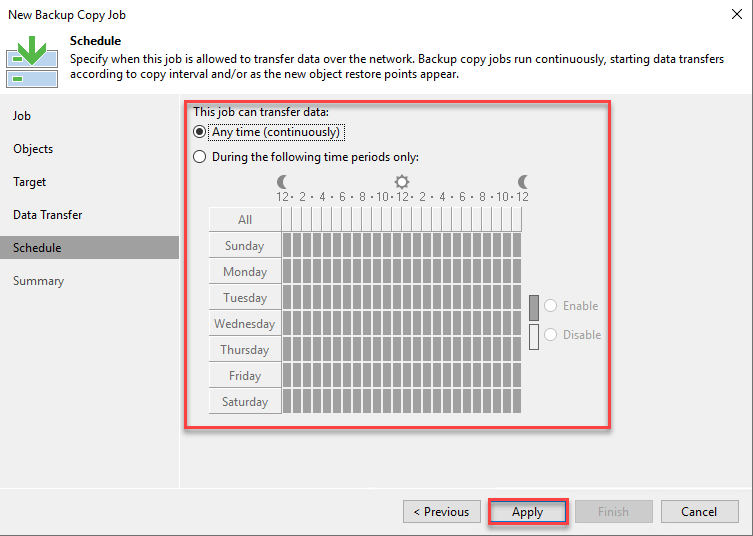
8. You can set the Veeam backup copy job to only transfer data during select times. For example, if you run production environments from 8am to 5pm every weekday, you can select During the following time periods only. Otherwise, select Any time (continuously) and click Apply.
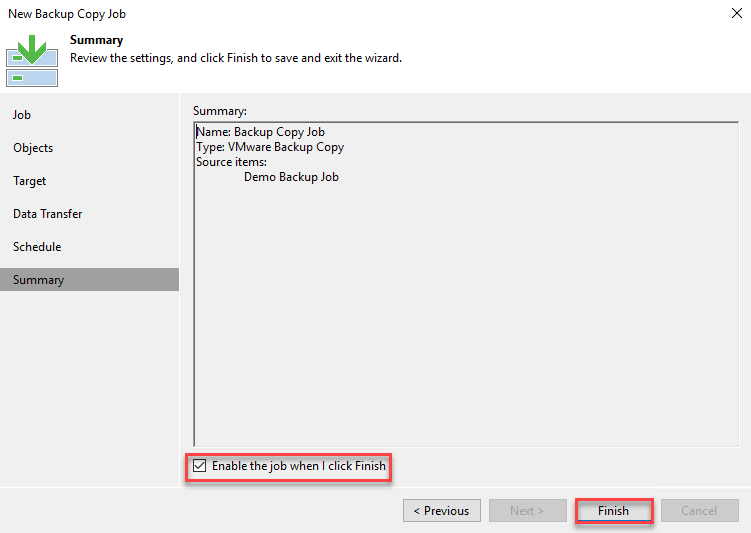
9. Ensure Enable the job when I click Finish is checked and click Finish.
The newly created backup copy job will now start copying your backups when it is allowed to transfer data as defined in the schedule.
Leave a Reply